Use of Patch function in PowerApps
In this article, we will learn about the Patch function what is PowerApps and how to use it in PowerApps.
Patch function is used to create or update single records or a list of records in the Data source. Using this values of fields can be modified without affecting other properties. Patch can be used to save data across multiple screens. While working with complex types Patch is very helpful. Lets take an example
Step – Create a list in SharePoint named Employees with fields and Data Type
- Name – Single line of Text
- Address – Multiple lines of Text
- DOB – Date and Time
- Age – Number
- Salary – Currency
- Profile – Hyperlink

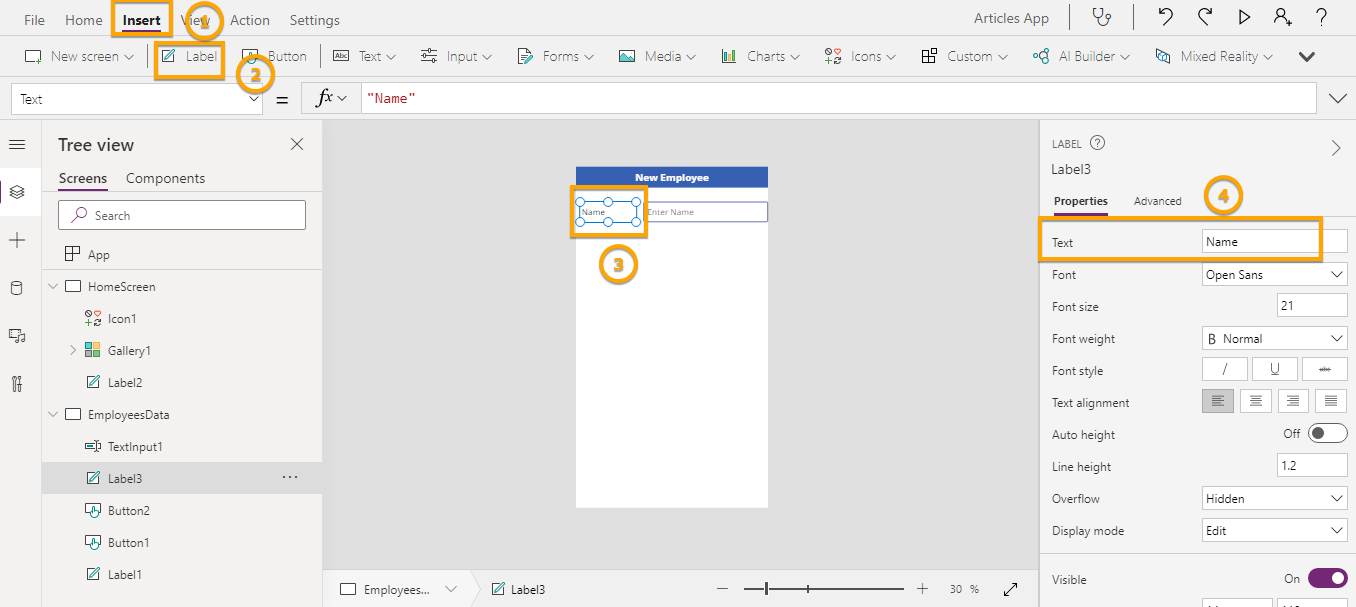
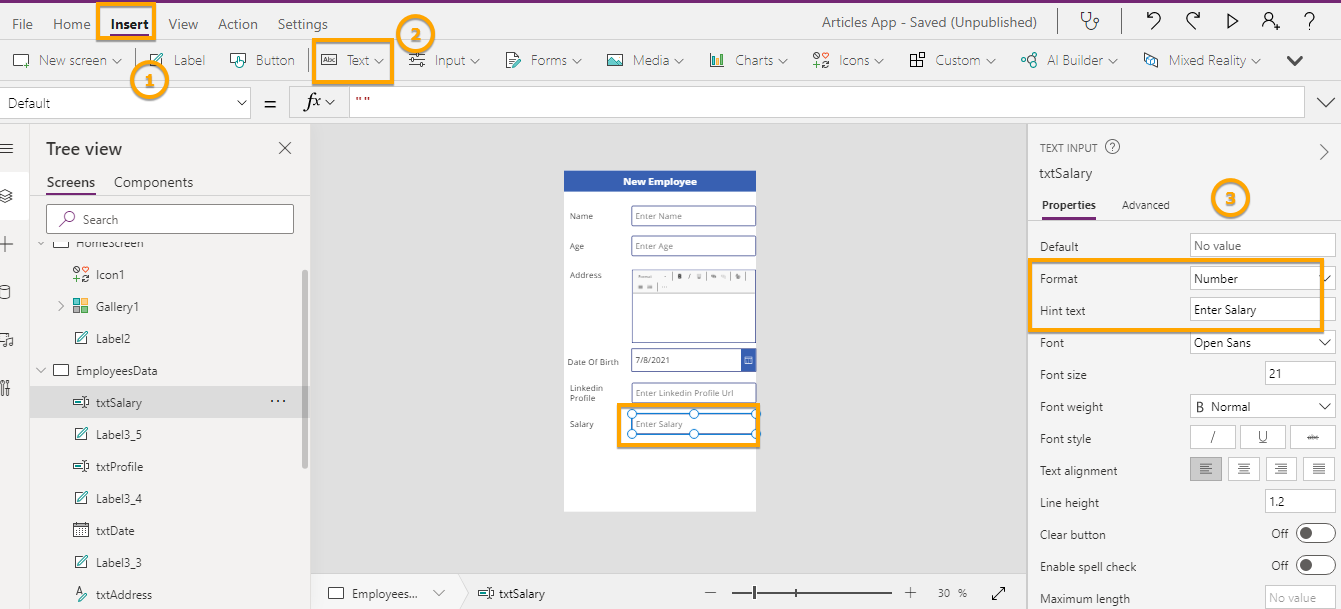
Step – Go to your PowerApp > Add Label and Textbox Control for Name field to the Screen
Add Label > After adding it to screen select Label and change its Text property from Property Pane
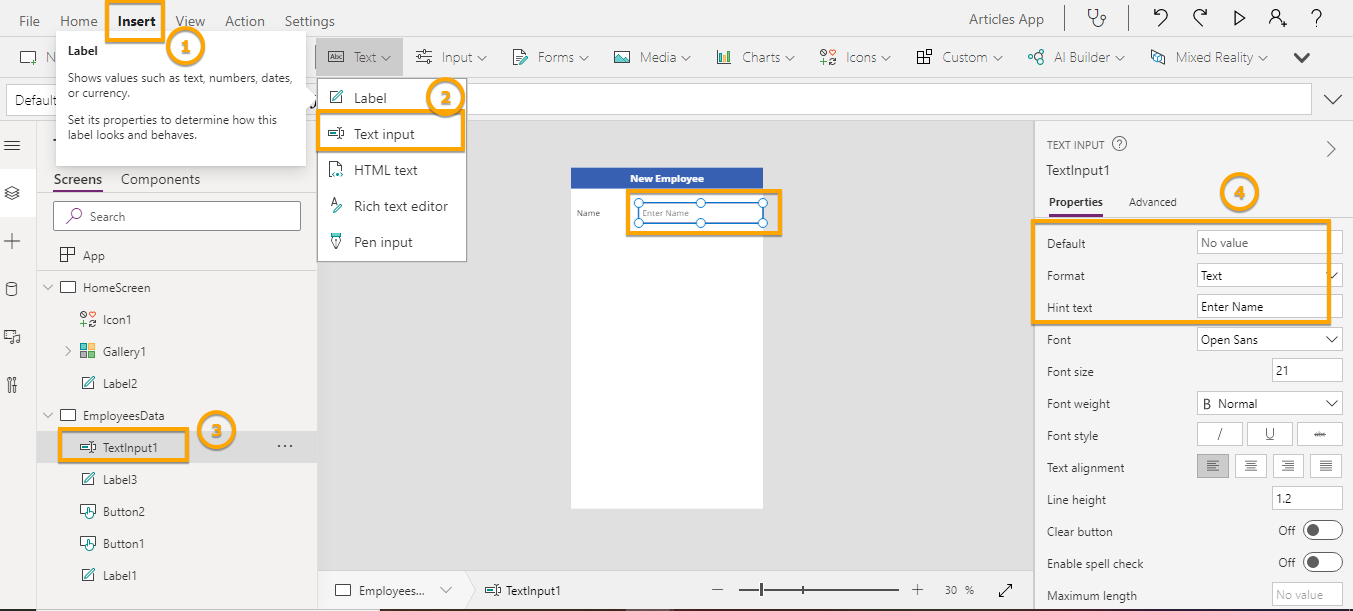
Add Texbox from Insert menu > After adding Select text input and Change its Default and Hint Text property
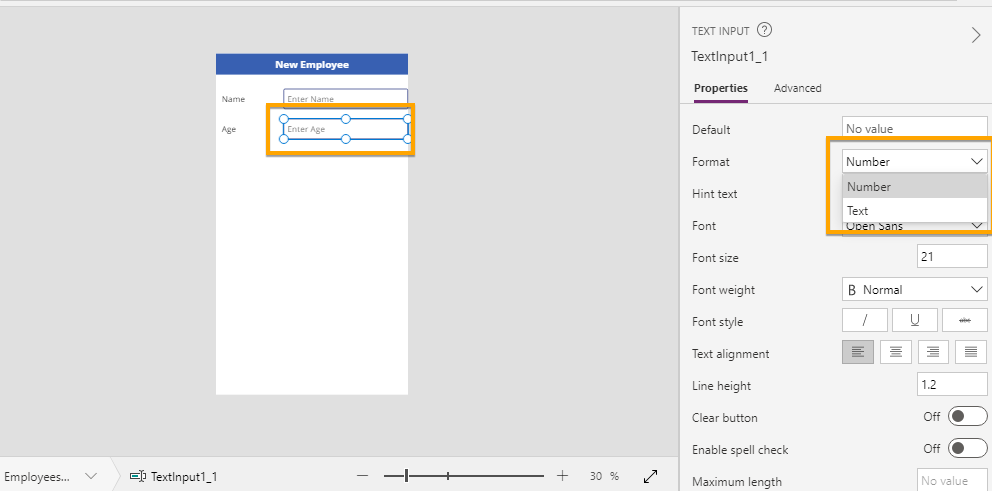
Same way add other Label for Age and TextInput for Age. Just need to change Format property to Number
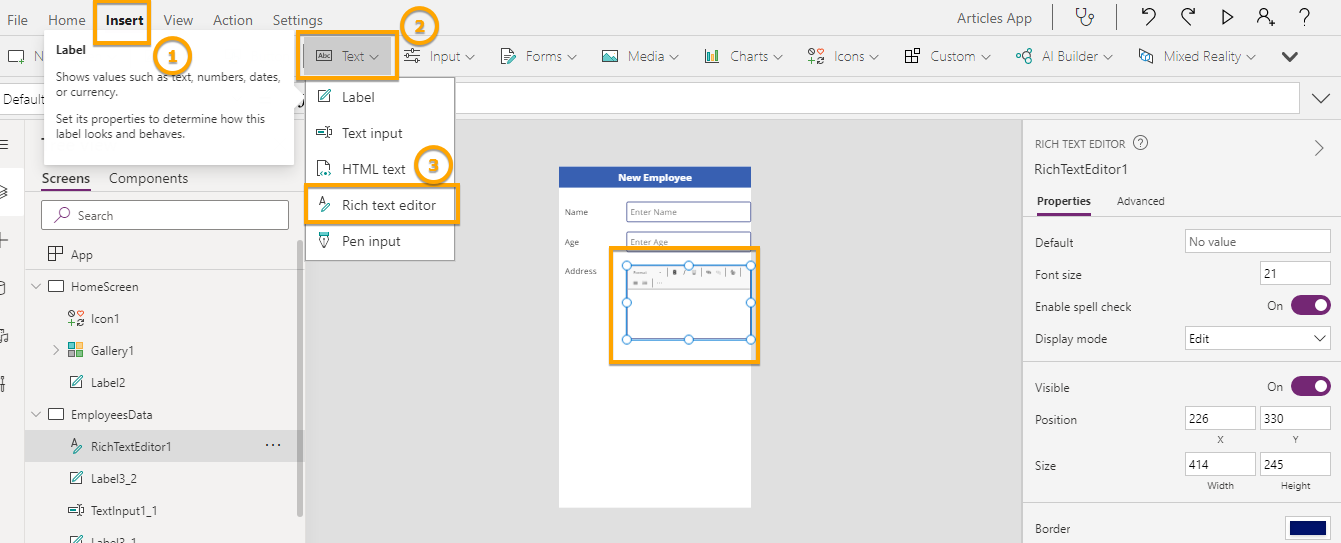
For Address add another label and rich text input
For Date of Birth , add Date picker control from Input menu

Add Linkedin profile url text field and update property

For Salary, add label and TextInput of Number format
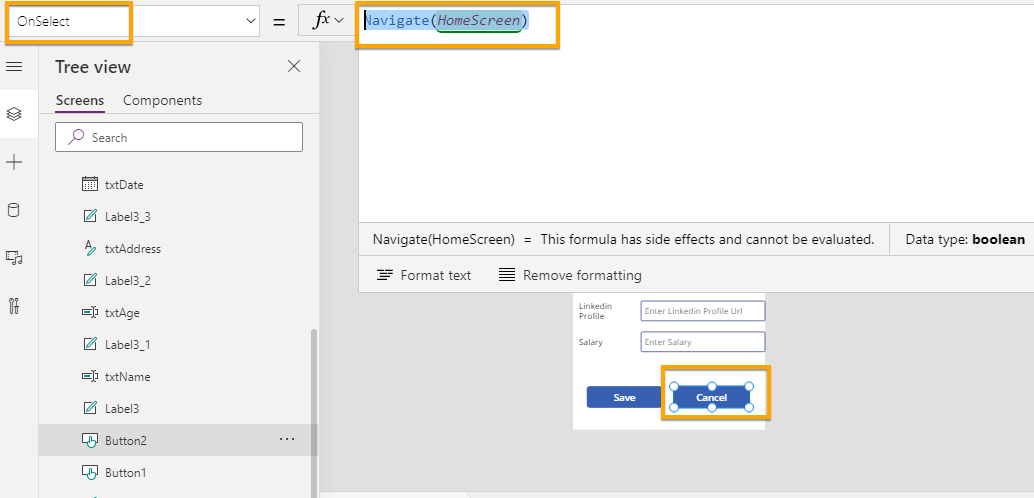
Step – Now add 2 more button for Save and Cancel on the form

Step – Now on click of Save button > we will write our Patch code
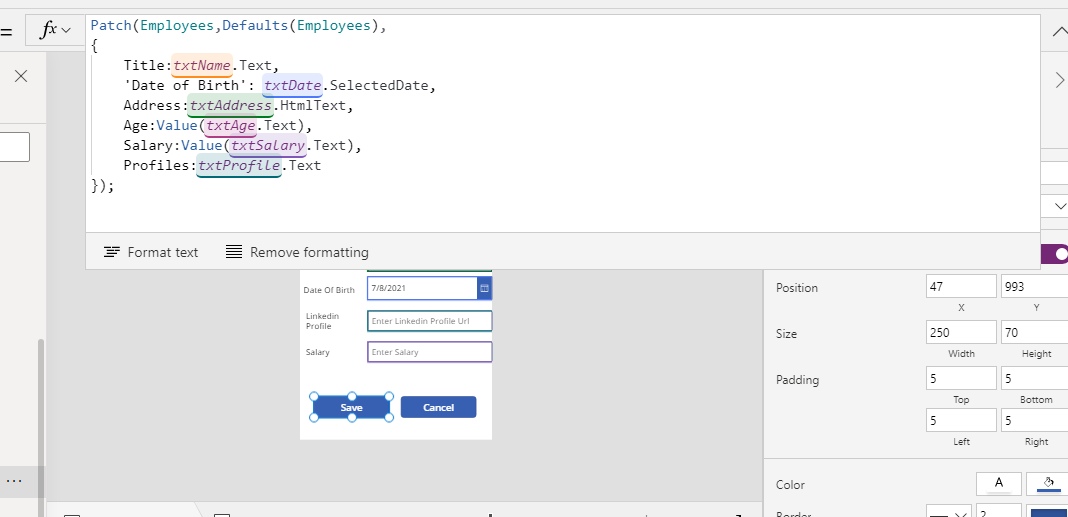
For Number and Currency field we need to convert the text to number using Value() function. To save Date and Time field, it will use controlname.SelectedDate
Syntax of Patch :
Patch(source,record,update,update,……)
Here source refers to the List on which operation need to be performed
record include the data on which update need to be done if any. If using Patch we want to create new record required Defaults function.
update refers to the actual record going to add/update. it includes record in curly braces {} and can be in any number separated by comma.
Like in example below,
Patch(Employees,Defaults(Employees),
{
    Title:txtName.Text,
    'Date of Birth': txtDate.SelectedDate,
    Address:txtAddress.HtmlText,
    Age:Value(txtAge.Text),
    Salary:Value(txtSalary.Text),
    Profiles:txtProfile.Text
});
Step – On click of cancel button , Add Navigate(HomeScreen)
Step – Run the Screen and Add details ,
Step – After filling details , Click on save. Now navigate to list and look on data inserted in SharePoint list.
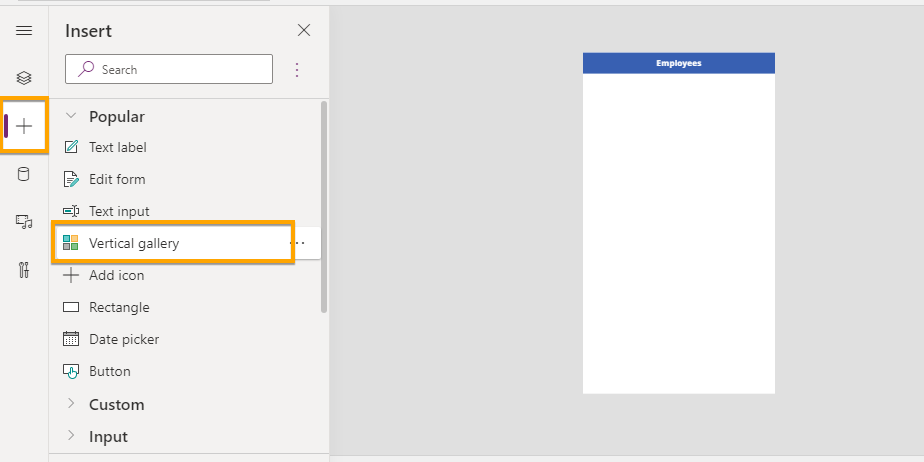
Step – Now Add one more screen that include Gallery which will Display all data from Employees list. New Controls > Add Vertical Gallery
Step – Now after inserting Gallery, Select Gallery > Right Panel select Data Source as Employees

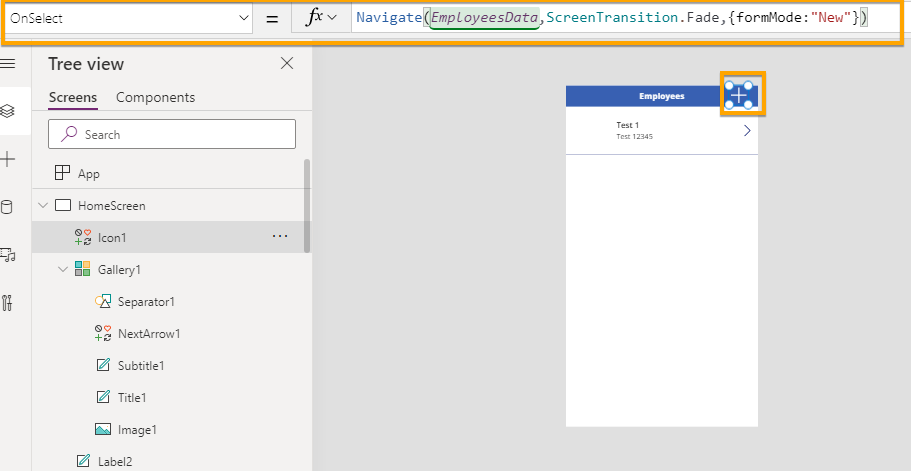
Step – Add New icon and on OnSelect property, add Navigate() function with formMode – New
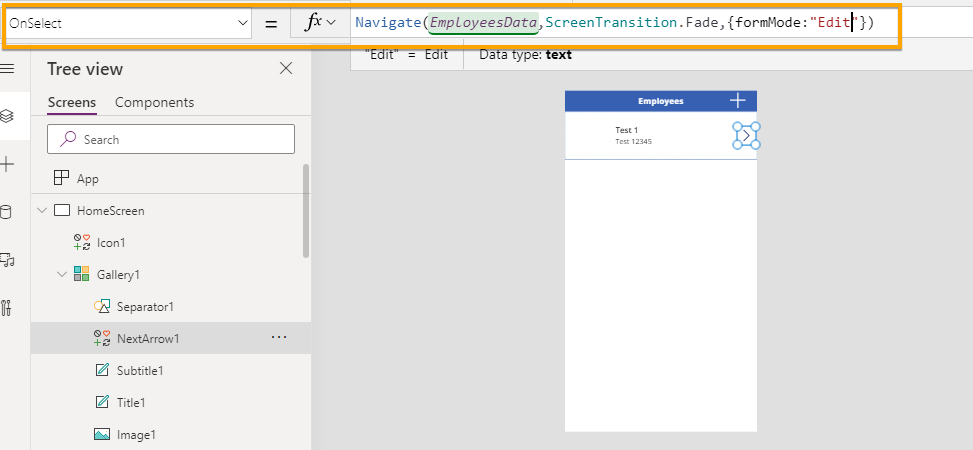
Step – On select of Next Arrow icon > Add Navigate() function with formMode – Edit
Step – Go to EmployeesData screen > Set Gallery1.Selected.<Field name> to all text values

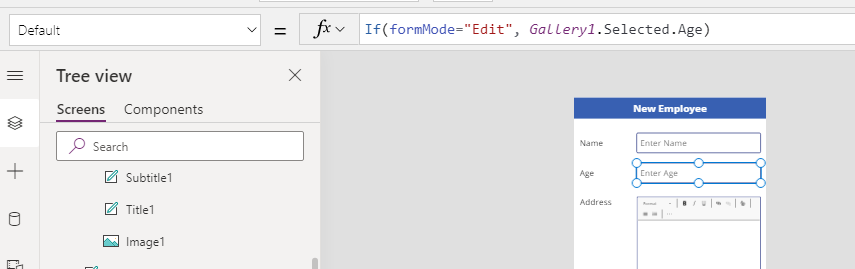
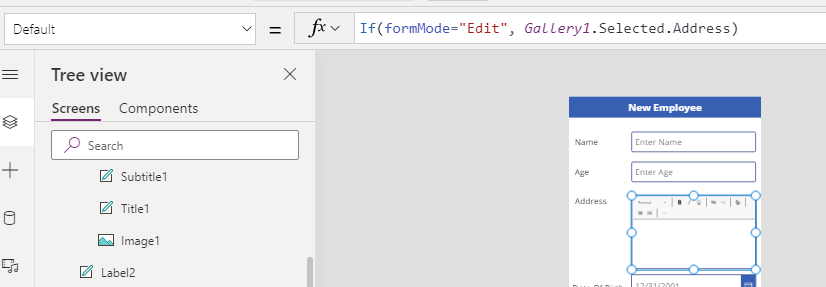
Like this way set for all other controls.
Also set condition in header to display Edit or New Employee.
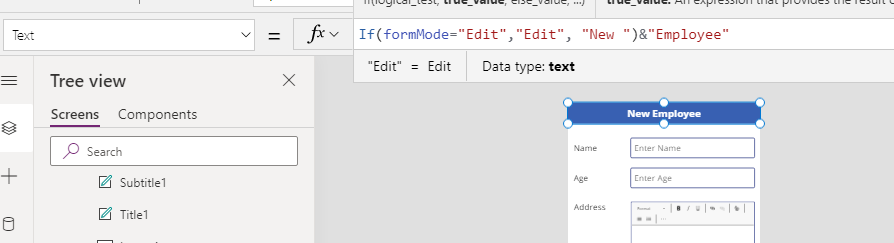
Step – Now open onclick of Save button and update Patch function as below,
Patch(Employees,If(formMode="New", Defaults(Employees),LookUp(Employees,ID=Gallery1.Selected.ID)),
{
    Title:txtName.Text,
    'Date of Birth': txtDate.SelectedDate,
    Address:txtAddress.HtmlText,
    Age:Value(txtAge.Text),
    Salary:Value(txtSalary.Text),
    Profiles:txtProfile.Text
});
Navigate(HomeScreen);
Step – Now lets run the Application, Click on next arrow to navigate
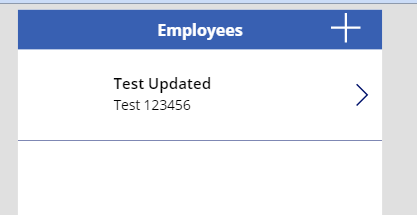
Step – Update All fields with some separate data and click on save

Step – Now you can see updated data

So in this way we can use Patch function to create and update records in SharePoint list using same screen. We can update any number of records using Patch.
