Managing Flows Of Power Automation With Office 365 CLI Commands
Office 365 CLI is a handy and useful PnP open source project which allows Office 365 administrators to perform administrative tasks on our Office 365 tenant. If you want to get a basic understanding, I would suggest you to go through this link.
Installation
Office 365 CLI is available as an npm package and can be installed through node js command prompt. As for this article, we would be using the beta release to test Microsoft Power Automate flow commands. Run the below command on node js command prompt to install the next beta release (I chose this to check new features, you can install stable release if you are using it for production use).
npm install -g @pnp/office365-cli@next
To install the latest stable release, use the below command.
npm i -g @pnp/office365-cli
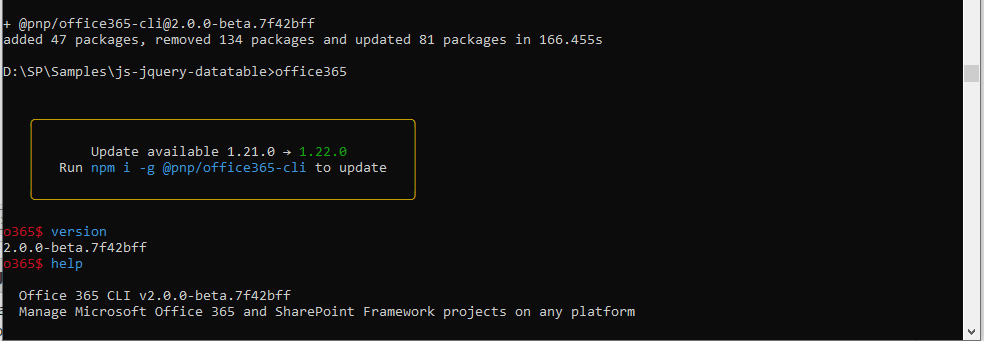
Get Office 365 CLI prompt
To get Office 365 CLI prompt on which we can run Office 365 command, run the below in node.js command. Refer to the above screenshot for output.
office365
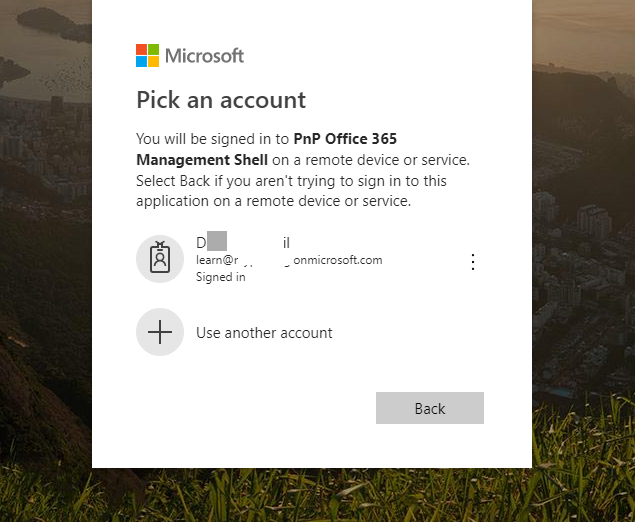
Login to Office 365,
login
It will display the below message,

Open the below URL in the browser and we should see the screen to enter code.
https://microsoft.com/devicelogin
Complete the self-explanatory login procedure. We should see the below screens one by one.

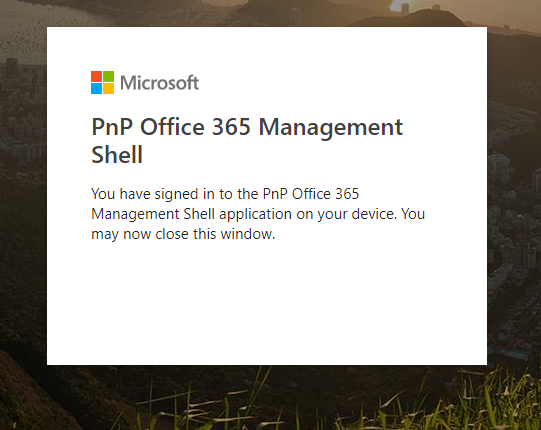
Close the browser and go back to the node.js command prompt. With this, you have successfully logged in to Office 365 and authenticated your PnP CLI to run commands on your tenant.
Let us see what flow (power automate) specific commands are available.
- help flow

Now let us try a few commands to see action.
The first thing we would do is get flow environments.
- flow environment list

Copy this name somewhere, we will need it later. As in my tenant, I have only one environment.
Get list of flow in your environment
Use the below command to get list of flows in your environment.
flow list --environment Default-91293b0-1234-4568-1234-78247791234
Please note the environment name is something which we got from the previous command, you can also get this from the url from where you are managing your flow.
Note
If for any command you are getting access denied error, it means command is not able to find flow or environment with paramater passed. So please double check the Ids being passed.
If for any command you are getting access denied error, it means command is not able to find flow or environment with paramater passed. So please double check the Ids being passed.

Get list of flow run history
flow run list --flow 57213e12340f2-1322-12323-2323-0d23237232706 --environment Default-5ba123b0-1e123b-46123d-8132b-2123791
4b9
–flow here is GUID of particular flow,

Disable a particular flow
flow disable --name 29230f2-1233-42323f-b238-0d232322706 --environment Default-51233eb0-1e6b-4233d-823bb-6b23217914b9
–name here is GUID of particular flow

if you go and check in Flow UI, you can see status wil be turned off.
Enable a particular flow
flow enable--name 29230f2-1233-42323f-b238-0d232322706 --environment Default-51233eb0-1e6b-4233d-823bb-6b23217914b9
Get information about flow
flow get --name 579e40f2-12312-4def-12321-0d211232706 --environment Default-5123eb0-123b-463d-8123b-6ba123

Other flow commands
Get environment information
flow environment get --name Default-5bac1230-1e6b-46123d-8dbb-6b2231233
Export flow
flow export --id 1232132-123-123312f-123-12321312306 --environment Default-1239eb0-1e6b-4123-8d123-6b1237791123 -p "d:\exportedflow.zip"
With this, I would like to conclude this article. I hope you got an idea about how we can use Office 365 CLI commands to manage Microsoft flows and what types of commands are available and also saw some of the commands in action with output.
Hope you enjoyed reading..!!
Note – This article was originally published at this link.
(Visited 120 times, 1 visits today)
