Customizing SharePoint List Form Using PowerApps
Introduction
In this article we will learn how to customize the SharePoint Online List Forms. No doubt, we have excellent forms for SharePoint Online lists, but sometime we do need some customization as per business needs such as some additional validation labels, some additional color combinations, horizontal forms etc. In order to do all this basic customizations few of them are supported by SharePoint List Form Formatting JSON codes, and for other such changes we can use Microsoft PowerApps.
So, here we will be checking all possible customization option available for SharePoint list in PowerApps.
Customization of SharePoint List Form Using PowerApps
To customize the SharePoint list form,
Open the SharePoint List and then click on New Button to create a new item. Then click on Configure icon from the top right corner and click on Customize with Power Apps as shown in the figure.

Then you will be redirected to the PowerApps builder screen where you will have the SharePoint form pre-loaded.

Notations
- Clicking here will get you back to the SharePoint list anytime.
- Tree view of all pages or screens that are in your apps.
- Your actual form area where you need to customize.
- This is property window, here you can set the properties of the controls.
- Play area, using this you can play your apps, undo, redo your actions.
- Your actual SharePoint form that you need to customize.
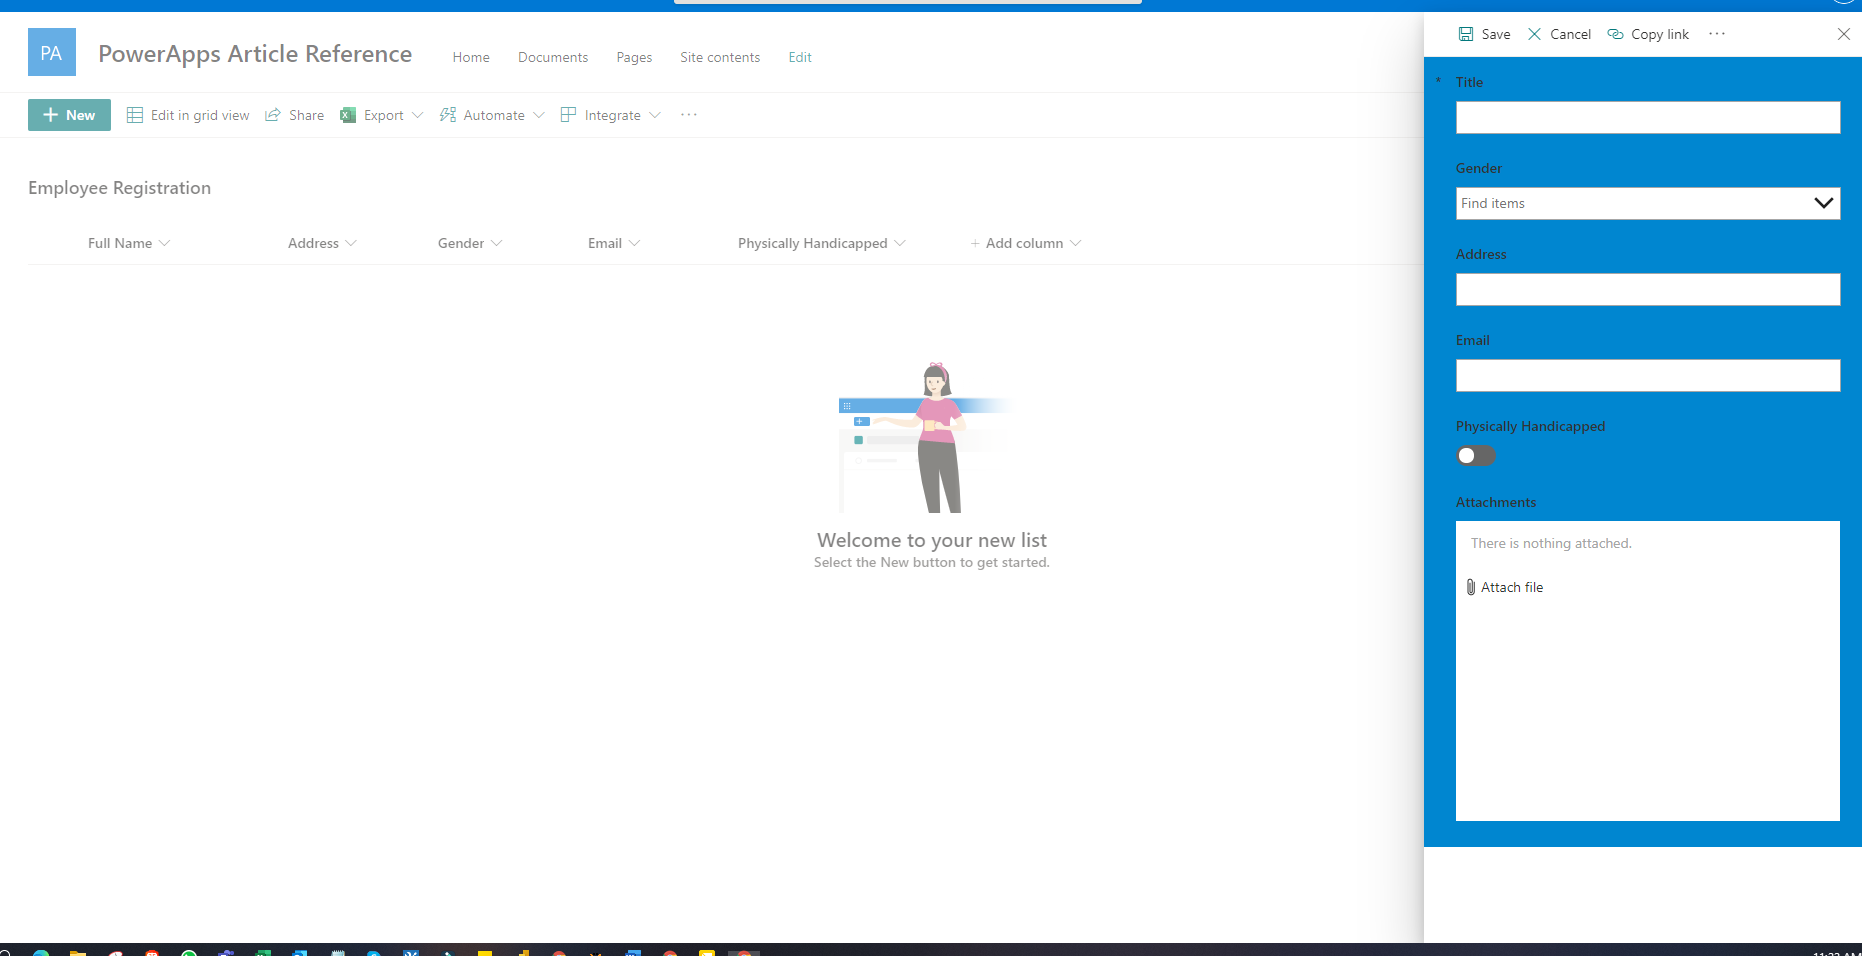
Now click on the SharePointForm1 from the left navigation Tree View and now you will see more customization option available to your right-side property pane.
In this article we will be focusing on following customizations
- Remove fields from PowerApps Form
- Add fields to PowerApps Form
- Change the form layouts
- Changing the column orders into the form
- Change the background color of the form
- Saving changes to the PowerApps Form
- Check your all saved version with comments
- Publish the changes to the SharePoint List
- Restore to specific saved version
Remove fields from PowerApps Form
Click on Edit Fields to add or remove fields of SharePoint list to this custom Form. For example, if you do not need attachment columns to the form then click on Edit fields and then click … [More actions] on attachment columns and then click on Remove.

Add fields to PowerApps Form
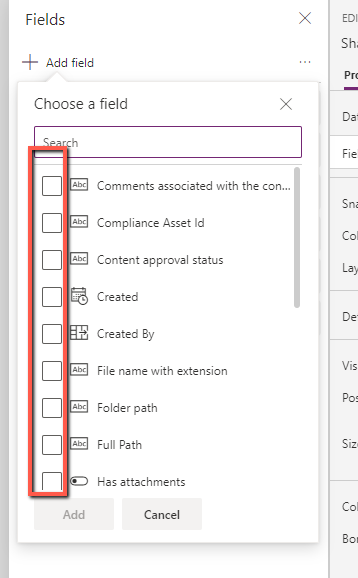
Click on Edit Fields option and then click on “Add field” option as shown in the figure.

After you click, you will have list of all fields that you can add. Just check the checkboxes of the field that you want to add it into your form and click on “Add” button and that will be added to your form.
Change the form layouts
Using Columns option you can decide how many columns you need to your app. Now if your requirement is to customize the form to have 2 column layouts. So, click on Columns and select 2 from the option.

Now you can see that your form got converted to 2 columns layouts.

Changing the column orders into the form
Now, you want to reorder the columns into the form. You need Gender to be appear just after Title field. So for that click on “Edit fields” option again and click on the three dots[…] on the Gender column.

Select “Move up” or “Move down” as per your requirement. In our case, click on “Move up” and Gender column will now moved one step up.

Change the background color of the form
To change the background color of the form, click on “Fill” icon from the property pane and select the color that you want to apply in the form background as shown in the figure.

Once you select your color, the form background will be changed to a selected color.

Saving changes to the PowerApps Form
It is always a good practice to save your all in progress works frequently to prevent loss from unexpected failure. Although PowerApps keeps saving your progress frequently at fixed duration, but if you manually want to do that you can simply hit “CTRL + S” button from the key board to save your work.
As soon as you save your form, PowerApps creates a new version of the app and stored it in the cloud. So PowerApps also allow us to enter the comments before every save done by you. To enter the comments and save the progress, click on File menu from the top menu bar and Click “Save” from the left navigation bar.

Here, you can enter your comments into the “Version note” and hit the Save button and in this way you can save your PowerApps form.
Check your all saved version with comments
As soon as you hit the save button, you will see button See all versions.

Just click on the button “See all versions” and you will see all the version of the app that is saved in a new tab with the Version note that you have entered while saving.

Publish the changes to the SharePoint List
Once you have done all the changes to the form and saved it, and now if you go to the SharePoint list form and try to see the updated form, you will notice that the SharePoint form is still the same. It is not changed as per your customization in PowerApps. That is because, your all changes are saved as a draft in the PowerApps cloud. In order to see the changes into the SharePoint list, you need to publish your PowerApps form.
To publish the PowerApps form, just click on File -> Save -> Save button. Once you have saved the form, it will display button to Publish to SharePoint. If you have saved your form, then it will directly display this button.

You can read the information line above the button Make your changes visible to end users by publishing to SharePoint. Click on Publish to SharePoint button, it will ask you for the confirmation, hit the button Publish to SharePoint from the dialog box and your app will get published to the SharePoint. Now you will have only “See all versions” button available.
Now check the SharePoint Form and you will notice that your PowerApps form is now available instead of SharePoint default list form.
Same form will be applied for Edit and View Screen.
Restore to specific saved version
Now you have done lots of work and now realize that the last saved PowerApps form was good to go and you do not need any further changes. So you can restore your app with specific saved version. To restore the app, click on File -> Save->Save and then click on “See all versions”. Then click on the three dots[…] next to the version number that you want to restore and click on Publish this version.
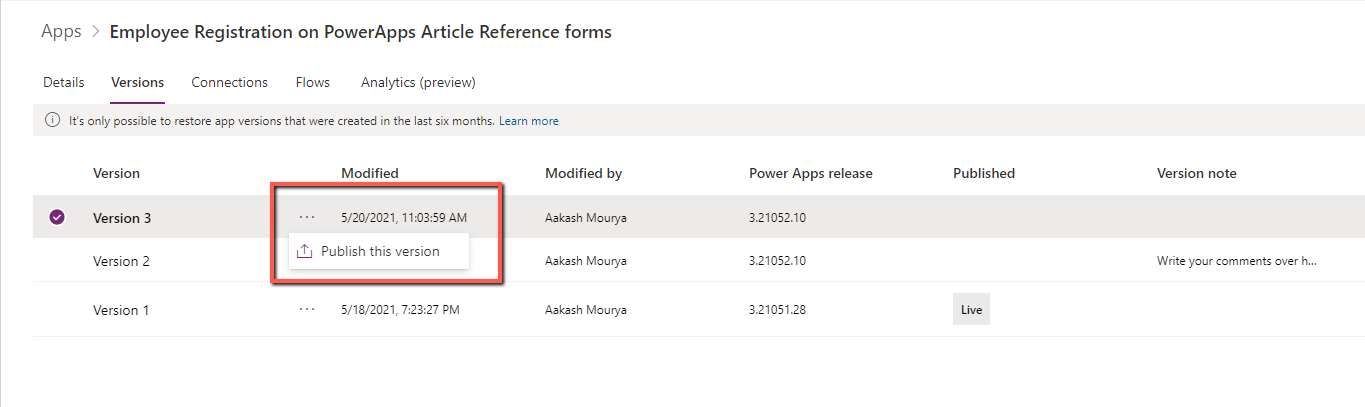
Once you click on that, you will see your specific version is now restored to the app with new version name and number.
Summary
In this article we have explored some basics of customizing the SharePoint list form using PowerApps.
If you have any questions or any query related to the above information, please feel free to reach out in the comment section.
