Customizing Data Card in PowerApps
In this article, we will learn how to customize data cards in PowerApps. There were scenarios where we need to change properties for the custom card other than what is provided by default. so to achieve that we need customization in Data Card.
Let’s see how customization in the Data cards works.
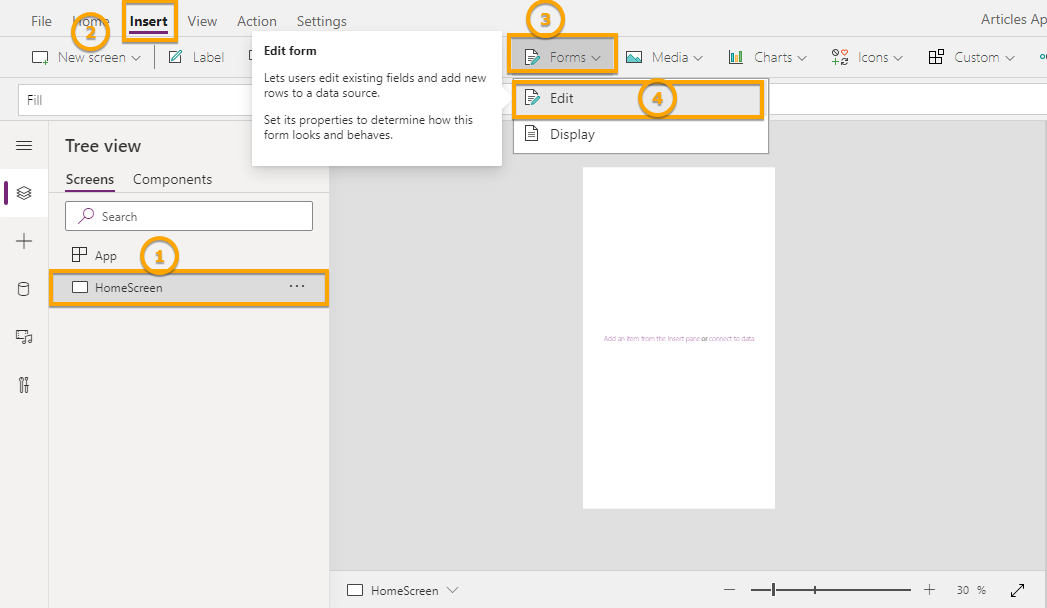
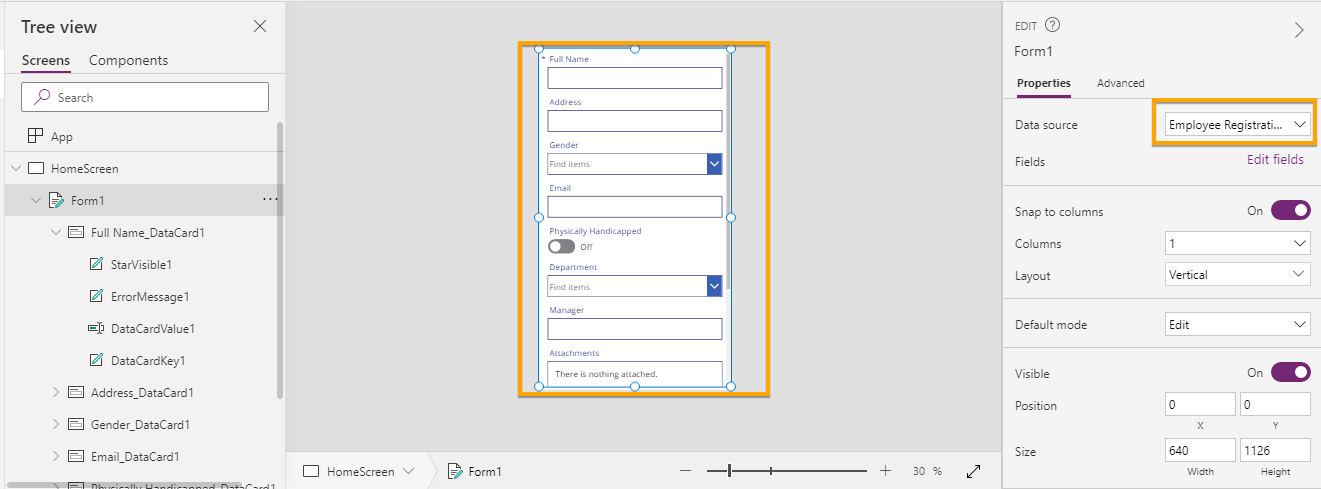
Step – Open you App > Add New Screen > from Insert Menu add Edit Forms
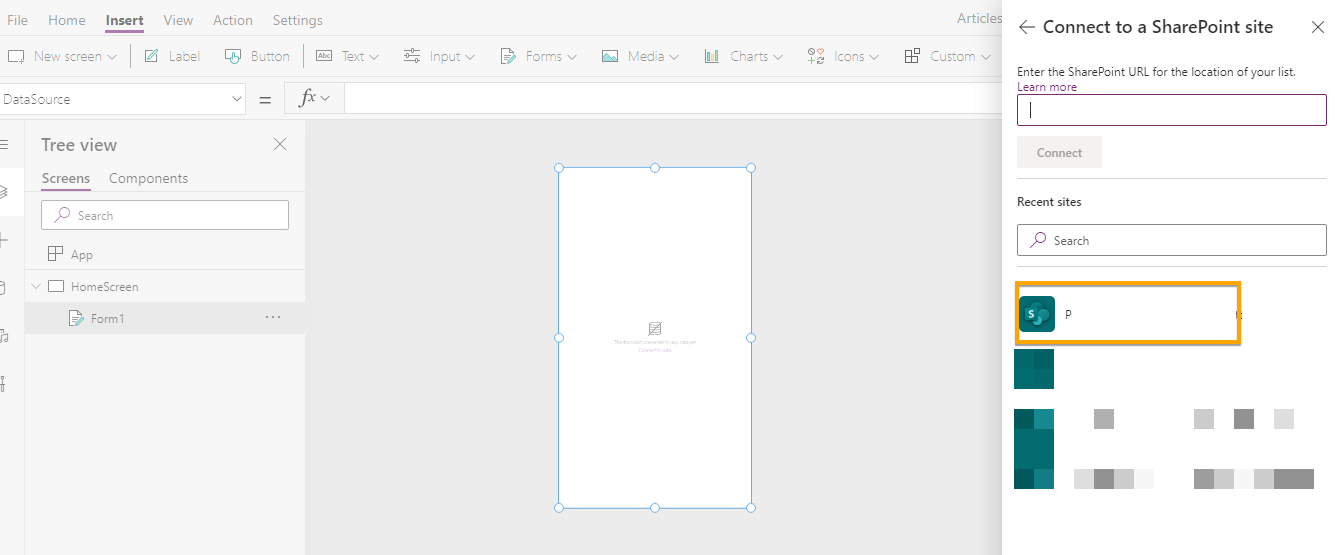
Step – On Right Pane > Select Data Source by default it will be none > from Dropdown you can search for SharePoint connector if you want to connect to SharePoint list

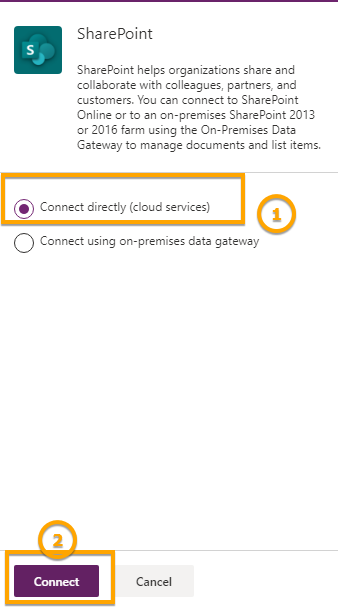
Step – Once selecting the connector it will ask you to connect from On-premise or online services > select online and click connect
Step – One the Connector connected > It will display all available list of SharePoint sites > select site from which you want to connect
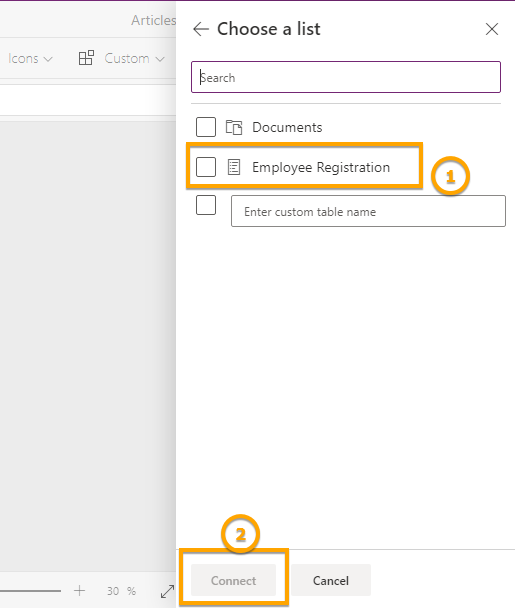
Step – Now select the list available from the selected site
Step – It will add all fields available in your list to the form
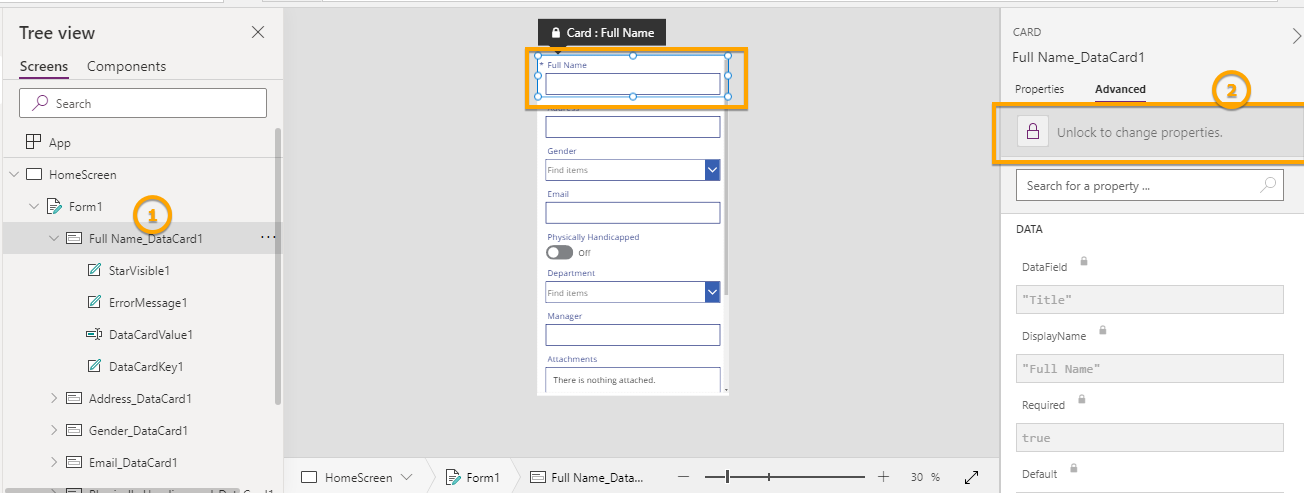
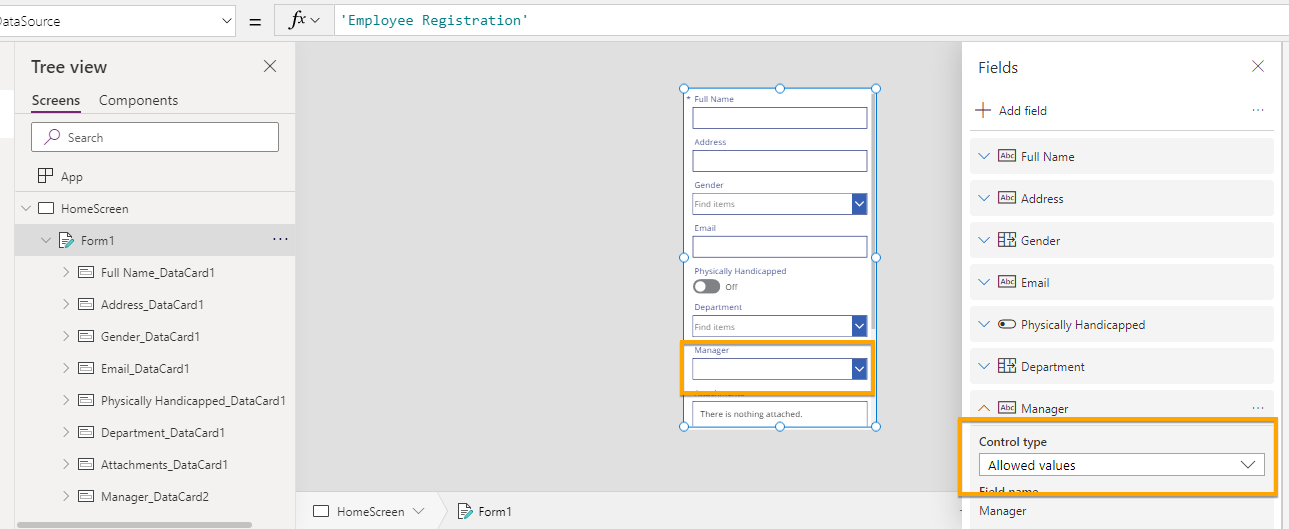
Step – From the below snap, if you notice that Data Card is a lock so to change anything in the existing Data Card you need to select data card and click on Unlock to change properties
The is a scenario where we want to display a list of users available in our Office365 in Manager dropdown but the case here is it is a single line of text so let see below how we can modify default control to a custom one,
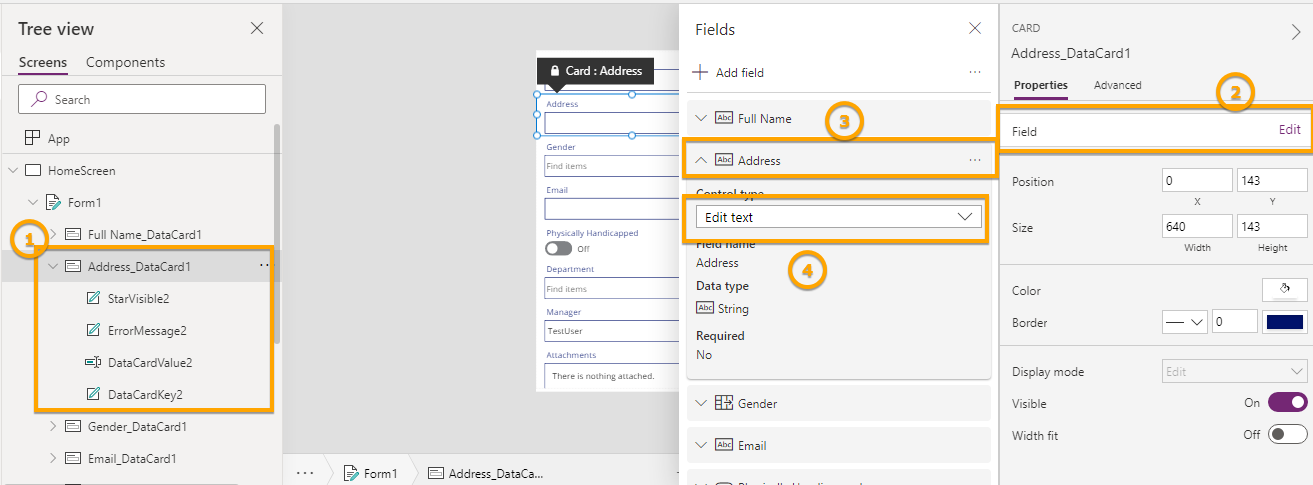
Step – Select Form > In Right pane, select Edit Fields > Select the field you want to change > select Edit Text dropdown
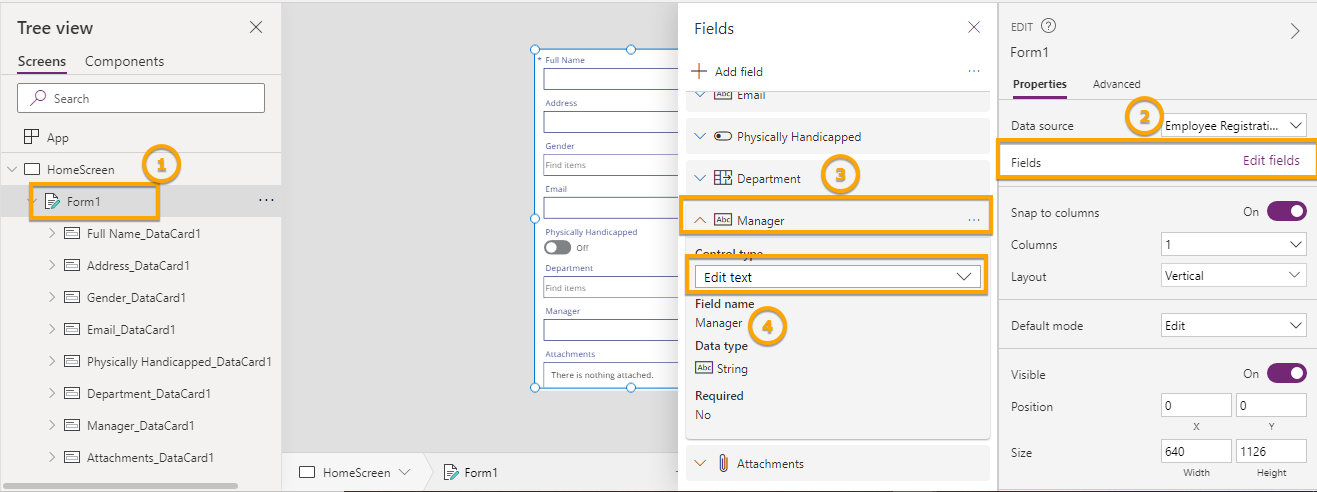
Step – When you open the Edit Text dropdown, it will ask for various options. you can select any of them for example if there is a number field it will automatically accept only numbers, the same goes with the phone, email, multiline of text and so on. So in our case, we will select Allowed Values
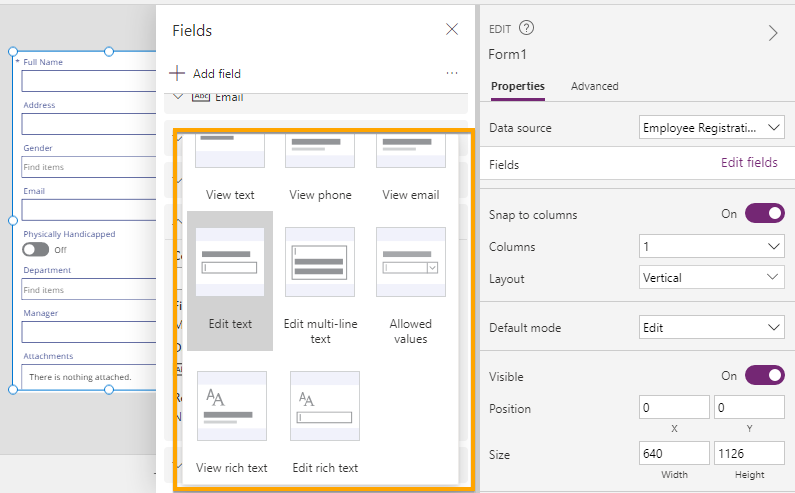
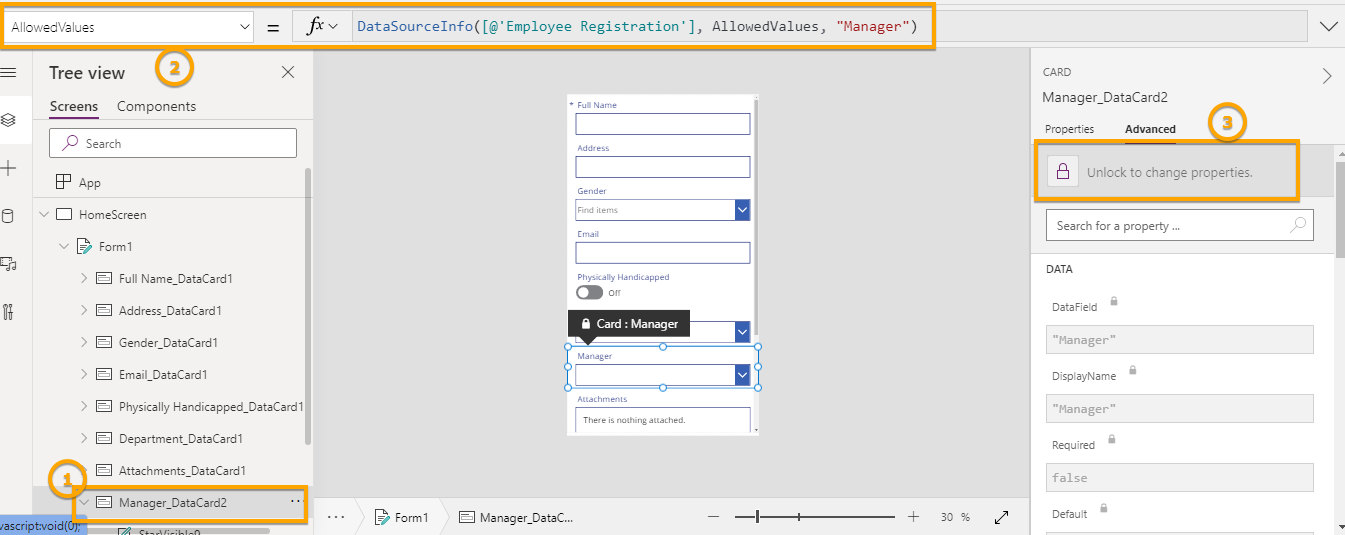
Step – As we selected allowed Values. It will automatically change to dropdown but currently, it is blank so we need to define the data source in it.
Step – Now to add AllowedValues we need to first click on unlock to change properties
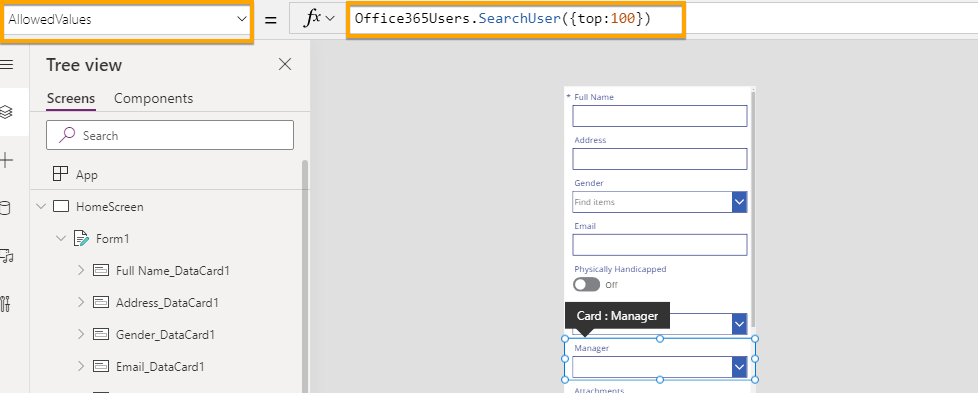
Step – To display the list of Office 365 users in the dropdown, we first need to add the Office365Users connector

Step – Add Office365Users.SearchUser({top:100}) code in AllowedValues
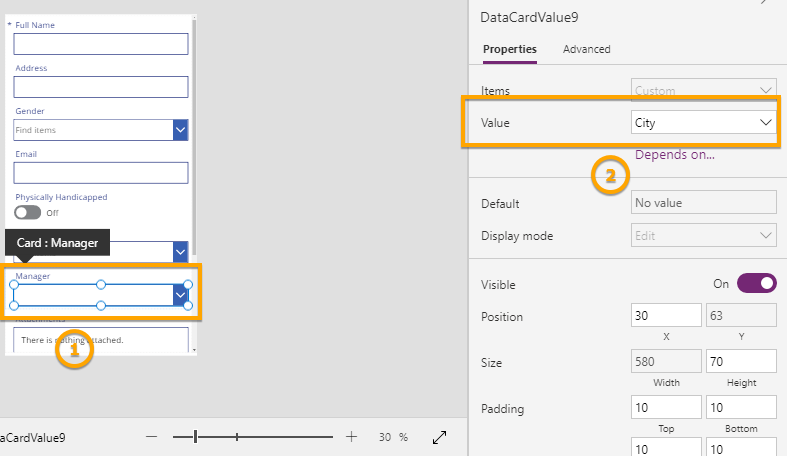
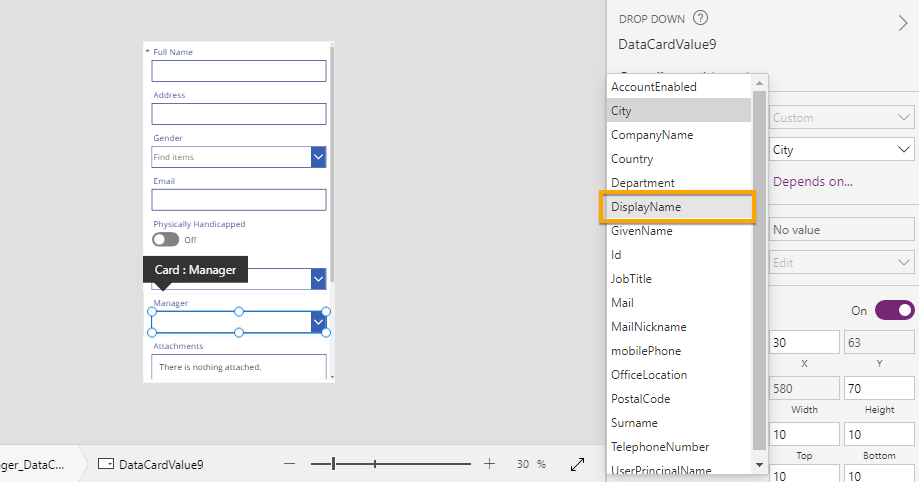
Step – Select the Manager Dropdown > In Right Panel > Select Value. By default it is City > Change it to Display Name
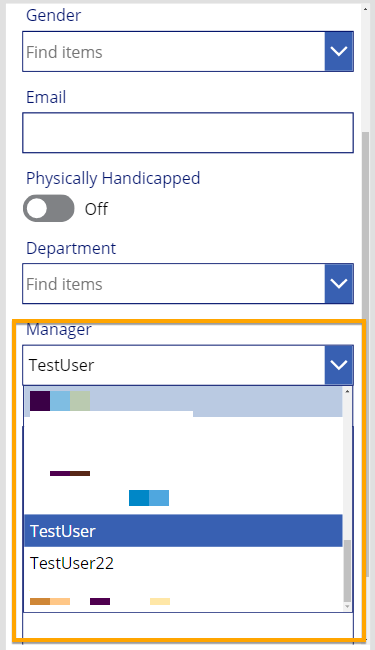
Now we can see the Manager dropdown is displaying All available Users from the Office365 account
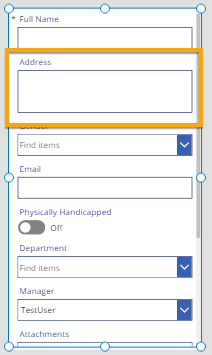
Now similarly we can change the Address to multiline text
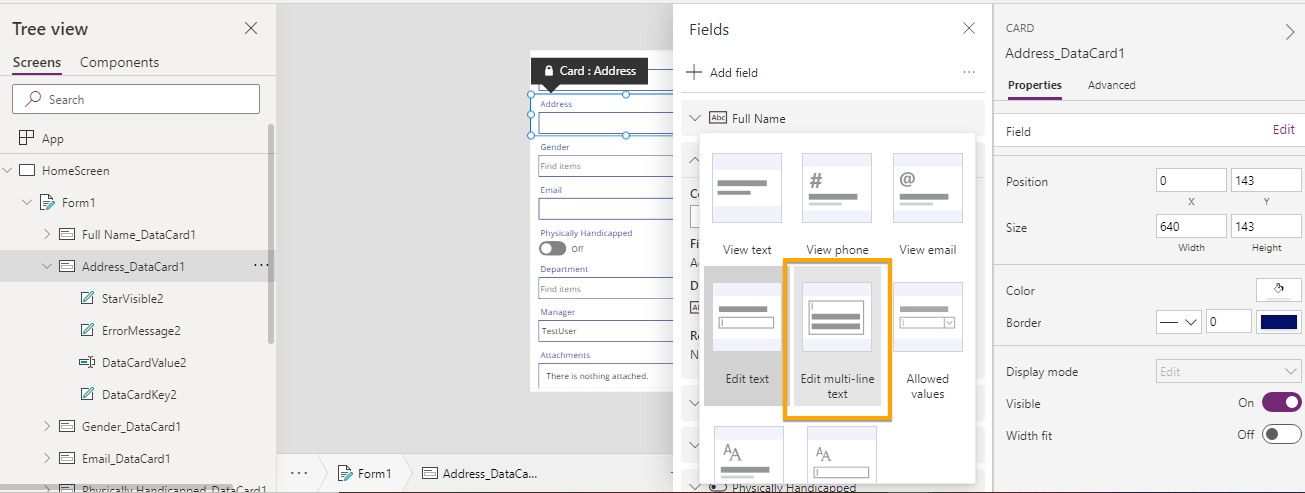
It will be displayed as below,
So this way, we can change any properties, look and feel, validation for data card control like we do for any single control.
Hope this helps…Happy low coding..!!
P.S – This article was originally published at this link.
